Posted by Archery Country on Sep 1st 2019
How To Shoot Your Bow Uphill or Downhill
If you've been hunting for a while, you may have noticed that game seldom stays on level areas. It's common for critters to move on hills, in ravines, or just about anywhere that gives them an advantage. Or maybe you're hunting from a tree stand where you're naturally above your game. In both cases, shooting game is different from practicing your shots on level ground. This can be problematic, especially for hunters new to bow hunting. Shooting uphill or downhill affects your accuracy if you fail to compensate for it. Many hunters have failed to hit their game because they haven't adjusted for shoot high or low. Here are some tips that will help you get your animal.
Use Proper Form -- Always
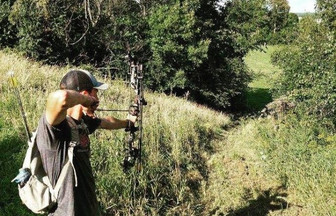
Many bow hunters miss their game when shooting steeply uphill or downhill because they fail to use proper form. Sure, they use proper form when they are on flat ground, but when they have to shoot up or down, their form changes. If you want to shoot correctly, you must first get in line for the shot using the correct form. Then, you must bend at the waist to line yourself up for the shot without changing the way you hold your bow. This can feel awkward at first, but when you change your form to something less correct to get a shot, you end up changing your sight picture and the actual way you have nocked your arrow. Your sight picture is the best way for you to know if you're going to put the arrow where you want it. If you nock your arrow high or low, it won't go where you think it should go. Thus, you end up with missed opportunities.
Practice good form and then compensating for shooting uphill or downhill during practice. You'll get smoother over time and bending only at the waist will become second nature.
Where to Aim
When shooting uphill or downhill, you need to understand what the true distance to your target is due to angle compensation. You want to shoot for the horizontal distance rather than the line-of-sight distance. Whether shooting steeply uphill or downhill, you'll want to aim slightly lower to hit your target. Using a rangefinder will take the guesswork out of it as well.
Adjusting for Gravity or Arrow Drop
In terms of arrow drop or gravity, you need to be aware of arrow travel. Make sure to understand the speed your arrow flies and adjust your shots to take into account arrow drop. This is due to gravity. Gravity starts interacting with the arrow once it leaves your bow string. That means that your arrow starts falling when you and your bow aren't holding it up. The flight path of your arrow is an arc because while your arrow is flying horizontally due to the propellant force from your bow, gravity is pulling the arrow to the ground. In fact, if you shoot your bow level and drop an arrow of the same mass at the same time, the arrows will hit the ground at the same time. Knowing where your arrow hits on a target at different distances will take the guesswork out of arrow drop. So, if your arrow drops 3 inches at 20 yards, you know you need to aim 3 inches high at 30 yards on level ground and angle compensate for actual distance when shooting uphill or downhill.
Adjusting for Parallax Error
Parallax error is introduced in archery because your eyes are usually several inches above the arrow and where you're aiming. At distances greater than 15 yards, this usually isn't a problem because the distance helps cancel out the parallax error. But at closer ranges, parallax becomes problematic. The best way to overcome this is to practice shooting at close ranges up and down hills to see where your arrow goes and adjust your sights accordingly.
The best recommendation for handling uphill and downhill shots is practice. Know your bow and where it places the arrows on targets 10 yards, 20 yards 30 yards away and more on level, uphill, and downhill targets. Get proficient and you'll never have to worry about missing the shot on that big buck.

